
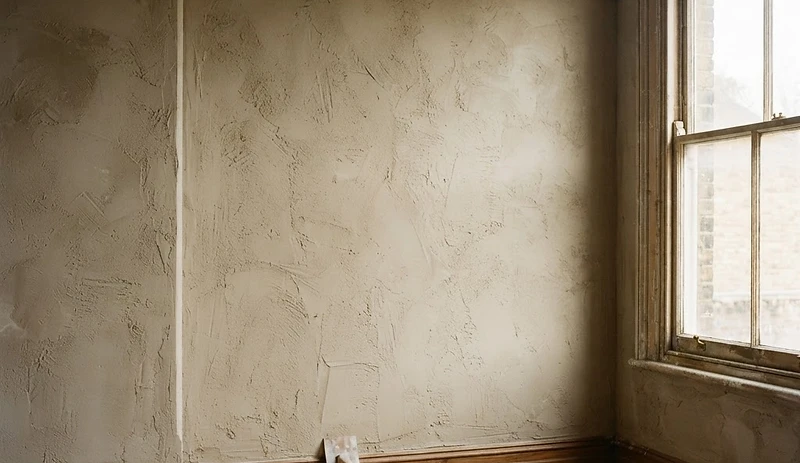
Plastering Services in Brighton
Safe-Bricks provides plastering services across Brighton and Hove for repairs, renovations and complete room refurbishments, with particular experience working in older solid-wall properties.
Our work includes conventional plastering where appropriate, but we also specialise in lime plaster systems for walls where the existing construction, moisture behaviour and historic materials make a traditional approach more suitable.
The plaster specification should follow the wall beneath it. We do not assume that every property requires the same system.
Plastering for Brighton Properties
Brighton and Hove contain a wide range of building types, from modern extensions and plasterboard partitions to older solid masonry constructed from brick, flint, bungaroosh and lime mortar.
The correct plastering method depends on:
- The wall construction
- The condition of the existing substrate
- Whether the wall is internal or external
- Existing moisture conditions
- Previous repairs
- The type of finish being removed
- The proposed decorative finish
Before significant replastering, we assess what is already on the wall and what lies beneath it.
Lime Plastering
Lime plaster remains an important material for many traditional solid-wall buildings.
Where appropriate, we can remove defective or unsuitable finishes and reinstate a lime-based plaster system compatible with the existing masonry.
Depending on the substrate and specification, this may involve:
- Preparing the exposed masonry
- Repairing loose or defective backgrounds
- Applying appropriate base coats
- Reinforcing vulnerable junctions where required
- Building the plaster in suitable coats
- Applying a compatible finish coat
- Allowing appropriate curing and drying
- Preparing for compatible decoration
The exact system is determined by the wall rather than selected from a standard specification.
When Lime Plaster May Be Appropriate
Lime plaster may be considered where a property contains:
- Bungaroosh
- Flint
- Soft historic brick
- Lime-mortared solid walls
- Existing historic lime plaster
- Traditional masonry affected by inappropriate previous finishes
It can also be appropriate where a wider repair strategy involves removing dense or incompatible internal finishes from a traditional wall.
However, the presence of an older building does not automatically mean that every wall must be replastered in lime.
Each area should be assessed individually.
Lime Plastering for Bungaroosh Walls
Bungaroosh deserves separate treatment because it behaves unlike any other plastering background in Brighton and Hove. It is a composite of flint, chalk, brick and cobble set in lime mortar, laid in irregular courses, and it varies from one part of a wall to the next. Two areas of the same room can present different strengths, suction and moisture behaviour, and the specification has to follow what is actually found.
Dense gypsum plaster works against that material. Bungaroosh relies on being able to dry from every face: moisture entering the wall moves through the mass and evaporates from the internal surface as readily as the external one. A hard, low-permeability internal finish closes one of those paths and holds moisture within a wall whose chalk fraction and binding mortar have limited strength to resist it.
Rigidity is the second problem. Gypsum sets into a comparatively rigid sheet, while a bungaroosh wall moves in small amounts with the seasons, as any composite of irregular materials does. A rigid finish cracks against it, and the cracks admit moisture behind the coating where it cannot then dry.
Preparing a bungaroosh background is unlike preparing standard brickwork:
- The exposed wall is assessed area by area, because loose chalk and flint nodes can sit directly beside sound material
- Soft or friable chalk and any unstable stones are removed or consolidated rather than skimmed over
- Open pockets and voids are filled in lime mortar keyed into the surrounding material, not filled with gypsum or caulked
- Junctions between bungaroosh and later brick, flint or repair work are prepared deliberately, since two backgrounds of different suction will otherwise cure differently within one coat
- Suction is controlled across the wall rather than assumed, because the chalk fraction draws water from a fresh coat far more aggressively than the flint around it
- Preparation avoids aggressive mechanical methods, since the wall is frequently weaker than the finish being removed from it
The lime plaster then does inside the building what lime render does outside: it allows moisture to pass through the coat and evaporate, and it buffers humidity within its own mass, so the internal face works with the wall rather than against it.
The number and composition of coats follows the three-coat lime systems described elsewhere on this page, and the drying period before decoration is set by the wall's moisture condition rather than a fixed date. Where an active moisture source is wetting the wall, that source is diagnosed before any replastering is specified.
Gypsum Plastering
Gypsum-based plaster remains suitable for many internal situations, particularly modern construction and dry internal partitions.
Our plastering work can include:
- Plasterboard ceilings
- Stud partitions
- Modern blockwork
- Suitable dry masonry
- Local repairs
- Making good following electrical or plumbing work
- Skimming suitable existing backgrounds
- New extension work
The important distinction is selecting a plaster system appropriate to the construction rather than applying the same material everywhere.
Replastering Older Walls
Removing old finishes can reveal a very different wall from the one visible beforehand.
Common conditions we encounter include:
- Loose historic plaster
- Cement-based repairs
- Gypsum patches
- Multiple incompatible layers
- Cracked backgrounds
- Salts
- Previous water damage
- Irregular masonry
- Redundant service chases
- Poorly bonded finishes
Once exposed, the underlying wall is inspected before the new plaster system is confirmed.
Where previous finishes are sound and appropriate, unnecessary removal is avoided.
Where they are defective or materially contributing to the problem, removal may be justified.
Plastering After Damp or Moisture Problems
Damaged plaster is often a consequence of another defect rather than the original cause.
Before replastering a wall affected by moisture, the source should be investigated.
Potential causes can include:
- Defective gutters or downpipes
- Leaking roofs or flashings
- Plumbing leaks
- Cracked external render
- Failed pointing
- High external ground levels
- Poor ventilation
- Condensation
- Water penetration around windows or doors
- Inappropriate previous repairs
A moisture-meter reading on its own does not establish which of these causes is responsible.
Our approach is to understand the construction and identify likely moisture sources before deciding what should be removed or replaced.
Removing Incompatible Plaster
Some older solid walls have been repeatedly covered with modern materials.
These may include dense gypsum plasters, cementitious backing coats or other finishes that are not always well suited to the underlying masonry.
This does not mean that every modern plaster automatically causes damp.
The effect depends on factors including:
- Wall construction
- Thickness and density of the finish
- External exposure
- Existing moisture sources
- Condition of the masonry
- Materials used on the opposite face of the wall
Where removal is justified, we carefully expose the wall, address active defects and specify an appropriate replacement system.
Three-Coat Lime Plaster Systems
Traditional lime plaster is commonly built up in several coats rather than applied as a single skim.
A typical specification may include:
- 1Preparation of the masonry background
- 2Base or backing coat
- 3Intermediate coat where required
- 4Fine finishing coat
- 5Appropriate curing and protection
- 6Controlled drying before decoration
The precise number, thickness and composition of coats varies according to the substrate and system selected.
We avoid presenting one plaster build-up as universally correct for every historic wall.
Cracked and Blown Plaster
Cracking or hollow-sounding plaster can have several causes.
These may include:
- Loss of adhesion
- Movement
- Previous water penetration
- Poor preparation
- Excessively rigid finishes
- Structural cracking
- Differential movement between materials
- Age-related deterioration
Minor surface cracking can sometimes be repaired locally.
Where the plaster has extensively lost its bond to the wall, more substantial removal and reinstatement may be required.
Structural movement is treated separately and should not simply be concealed beneath new plaster.
Ceilings
Our plastering services can also include ceiling work such as:
- Plasterboard installation
- Overboarding suitable existing ceilings
- Skimming
- Local ceiling repairs
- Making good after electrical works
- Repairs following leaks
- Ceiling replacement as part of refurbishment
The condition and construction of the existing ceiling are assessed before deciding whether it should be repaired, overboarded or replaced.
Plastering During Renovation Work
Plastering is frequently one stage of a larger Safe-Bricks project.
We can coordinate it with:
- Kitchen renovations
- Bathroom renovations
- Electrical alterations
- Plumbing work
- Wall alterations
- Structural work
- Bungaroosh repairs
- Lime rendering
- Decorating
- Home extensions
This allows the wall repair, plastering and final decoration to be planned as one sequence rather than as disconnected trades.
Preparation Matters
Good plastering depends on the condition of the background.
Before application, preparation may include:
- Removing loose material
- Cleaning masonry
- Repairing defective joints
- Filling service chases
- Stabilising suitable backgrounds
- Controlling suction
- Preparing junctions between different materials
- Installing suitable beads where required
- Protecting adjoining finishes
The preparation method is adjusted to suit the plaster system being used.
Decoration After Plastering
New plaster must be allowed to reach an appropriate condition before final decoration.
The correct timing and coating depend on:
- Type of plaster
- Thickness
- Environmental conditions
- Moisture content
- Substrate
- Proposed paint system
Where lime plaster has been used, the final decorative system should also be selected with material compatibility and drying potential in mind.
Plastering Services in Brighton and Hove
If you need plaster repairs, complete replastering or advice on the correct finish for an older wall, send Safe-Bricks photographs of the affected area.
Useful photographs include:
- The complete wall or room
- Close-ups of cracks or damaged plaster
- Areas of staining or previous moisture damage
- Exposed masonry where visible
- External photographs of the corresponding wall where relevant
Photographs can help us understand the likely construction and scope, but significant moisture or traditional-building problems may require an inspection before a specification is confirmed.
Not sure where to start?
Send us photographs of the area of concern. It is the most straightforward first step — we will look at what you can see and advise on the appropriate next steps.