
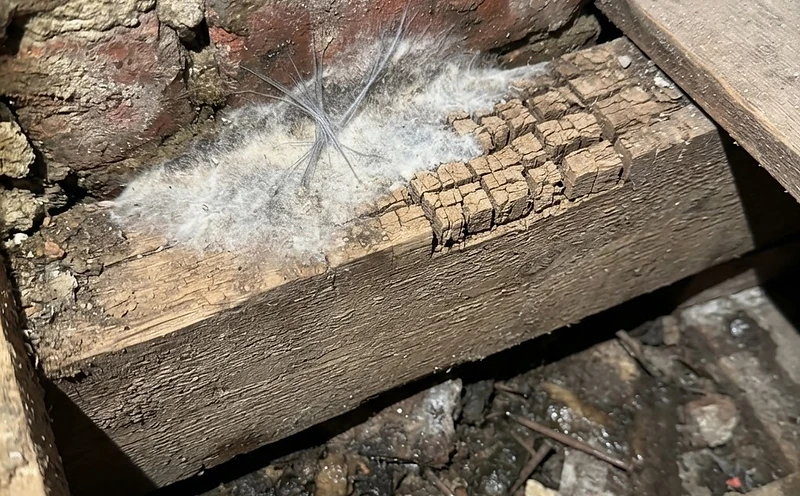
From site
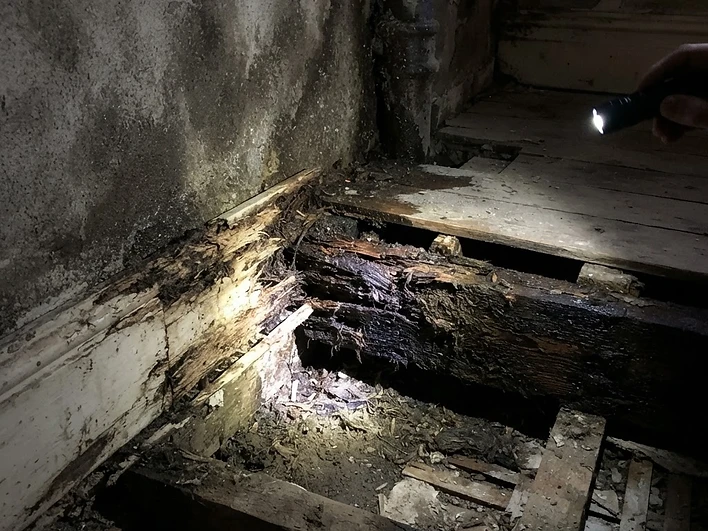
If someone lifts a board by the back door and finds white growth and timber that breaks up under a screwdriver, I’d start by working out how far it goes. I’d want to look at the neighbouring joists, the wall they sit in and the next section of floor void. The first board usually comes up where the damage is easiest to see, so it tells you very little about where the damage stops.
I’d check the rainwater connections and the ground outside that corner as well. If the type of fungus is uncertain and the answer would change the scope of the work, I’d get it identified before agreeing how much needs opening up. Finding a leak gives me somewhere to start. Checking the surrounding timber and masonry tells me what else needs attention.
Rupert De La Mare, Project Manager & Director
What owners usually find under floorboards
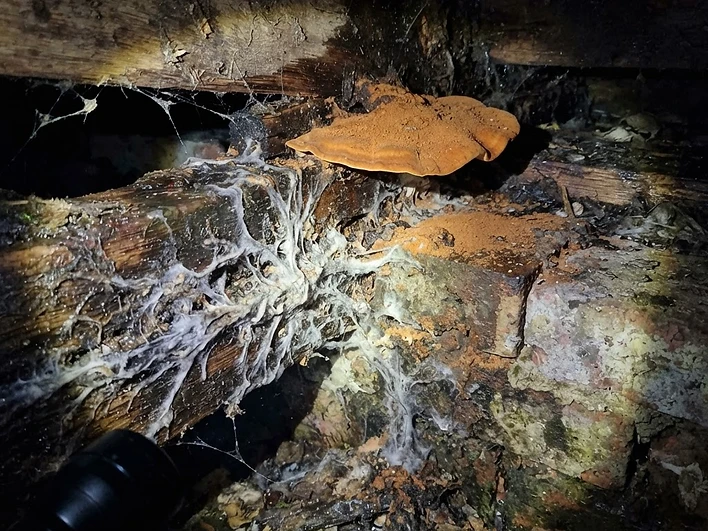
The first sign is often a board that gives way, a musty, mushroom-like smell, or timber that crumbles when touched. Some owners find fungus under floorboards: white cotton-wool growth, grey strands or a flat, pancake-like fruiting body with a rust-coloured dust around it.
Photograph what you see before disturbing it, and note where it is in relation to external walls, pipes and air bricks. That position is often more useful than the fungus itself.

How to identify dry rot and wet rot
Telling dry rot vs wet rot apart is done from a combination of signs rather than any single one.
Signs that point towards dry rot
- Deep cuboidal cracking: timber split into large brick-like cubes, light and dry to the touch.
- Thick grey or white strands, sometimes as thick as a pencil, running over brick, plaster or behind skirtings.
- Silky white or grey sheets of growth, often with lilac or yellow patches.
- A fleshy fruiting body with a rust-red centre and fine red spore dust nearby.
Signs that point towards wet rot
- Decay confined to timber that is visibly wet or recently wet.
- Darkened, soft or stringy timber, sometimes with smaller cubical cracking.
- Thin dark brown or black strands, if any, that stay on the timber.
The key difference is behaviour: dry rot can travel through masonry in search of timber, while wet rot stays where the moisture is.
Why fungal decay starts under period floors
Wood-decaying fungi need timber to stay wet for long periods. Under a suspended floor this typically follows a loss of ventilation, raised external ground, a leaking downpipe or plumbing, or cement render and pointing that hold water in the wall.
The fungus is the result; the moisture is the cause. Once the timber dries below the level the fungus needs, decay stops. Dry rot can survive longer in a building that is drying slowly, which is why its identification matters for how far the investigation extends.
What has to be checked before any treatment
Investigation sets out to answer three questions: which fungus is present, whether it is still active, and where the moisture is coming from.
- Boards are lifted to trace the extent of growth and decay, following any strands to their limit.
- Timber moisture readings show current conditions in the affected and neighbouring timbers.
- External walls, ground levels, gutters, downpipes and air bricks are checked for the moisture source.
- Where dry rot is suspected, adjacent voids, skirtings, panelling and lintels are opened selectively to find how far strands have travelled.
Plaster is not stripped wholesale on suspicion alone. Opening up is targeted at what the evidence shows.

What the findings should record
A useful report states which fungus was identified and on what evidence, whether it appears active or historic, its mapped extent, and the moisture source with a stated level of confidence.
It should keep separate what was observed, what is typical for this kind of floor and what remains possible but unconfirmed. Photographs of each opened area, marked on a floor plan, allow the conclusions to be checked by an insurer, surveyor or another specialist.
Compatible repair options
The moisture source is dealt with first: ventilation reinstated, ground levels lowered, leaks repaired or moisture-trapping materials removed. The structure is then allowed to dry.
Decayed timber is cut back to sound material and repaired or replaced, with new timber isolated from damp masonry at the bearings. For wet rot, removing the moisture source and the decayed timber is usually sufficient. For dry rot, timber is cut back further beyond the visible decay, and localised treatment of adjacent masonry may be specified where strands have crossed it.
Blanket chemical treatment of a whole floor or building is rarely justified once the cause has been removed and the building is drying.